Thuya Brow Lamination Instructions: A Comprehensive Guide
Thuya brow lamination offers a professional pathway to beautifully sculpted brows, utilizing a kit containing permanent gel, neutralizer, and regenerating cream for optimal results.
Thuya Brow Lamination has rapidly become a sought-after service in the beauty industry, offering a transformative solution for achieving perfectly sculpted and fuller-looking eyebrows. This comprehensive guide delves into the intricacies of the Thuya system, providing professionals with the knowledge and techniques needed to master this increasingly popular treatment.
Unlike traditional brow shaping methods, Thuya Brow Lamination doesn’t simply reshape the brows; it restructures the brow hairs themselves, allowing for greater flexibility and control. The process involves relaxing the hair’s bonds, allowing them to be easily manipulated into a desired shape. This results in a fuller, more defined brow that lasts for several weeks, minimizing the need for daily makeup application.
This guide will walk you through each step of the Thuya Brow Lamination procedure, from preparation and application to aftercare and troubleshooting, ensuring you can deliver consistently stunning results to your clients. It’s a powerhouse of knowledge, packed with real science and detailed protocols.
What is Thuya Brow Lamination?
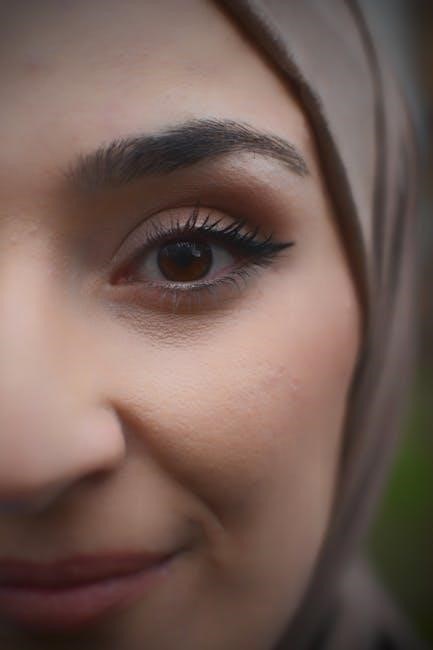
Thuya Brow Lamination is a professional eyebrow treatment designed to smooth and redirect eyebrow hairs, creating a fuller, more uniform look. It’s a process that essentially “relaxes” the brow hairs, allowing them to be easily reshaped and set in a desired direction. This differs from a simple brow lift, as it works on the structure of the hair itself, rather than just lifting the skin.
The Thuya system utilizes a specialized chemical solution – a permanent gel – to break down the disulfide bonds within the hair. This allows the hairs to become malleable and reshapeable. Following the application of the permanent gel, a neutralizer is used to reform these bonds, locking the brows into their new, desired position.
The result is a beautifully sculpted brow that appears fuller, more defined, and stays in place without the need for constant brushing or styling. It’s a long-lasting solution, typically maintaining its shape for 4-6 weeks, depending on individual hair growth cycles.

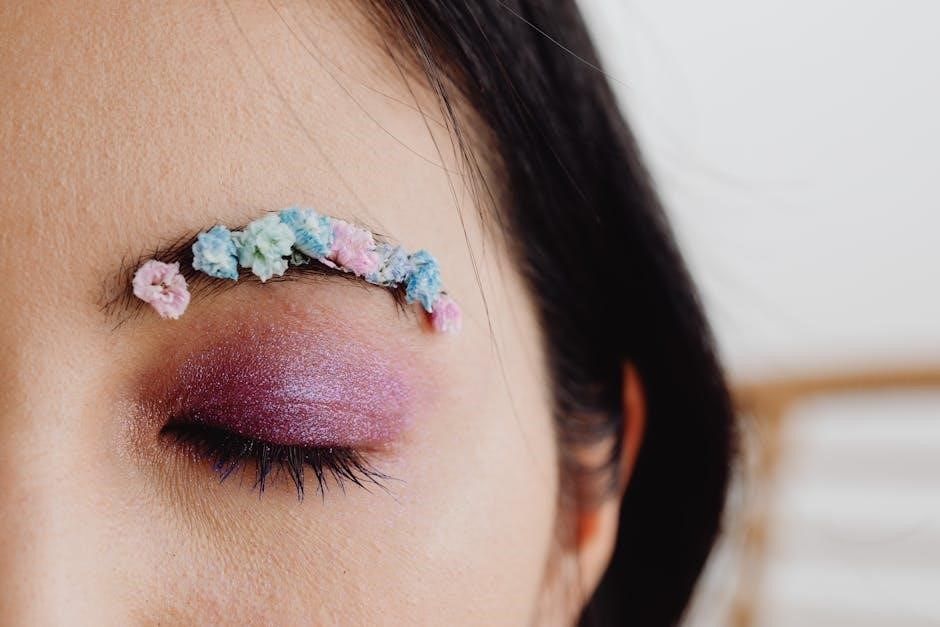
Benefits of Thuya Brow Lamination
Thuya Brow Lamination offers a multitude of benefits for both clients and professionals. Primarily, it creates fuller, more defined brows, even for those with sparse or unruly hair. The lamination process effectively tames stray hairs, resulting in a neat, polished appearance that simplifies daily makeup routines.
Unlike microblading or other semi-permanent makeup, Thuya lamination is a non-invasive procedure, minimizing discomfort and downtime. It’s a versatile treatment suitable for various brow types and shapes, allowing for customized results tailored to each client’s unique features.
Professionals benefit from the treatment’s relatively quick application and long-lasting effects, leading to increased client satisfaction and repeat business. Utilizing the Thuya kit ensures a high-quality, consistent outcome, backed by a comprehensive understanding of brow hair science and aftercare protocols. The treatment enhances and frames the face beautifully.

The Thuya Brow Lamination Kit: Components & Overview
The Thuya kit includes permanent gel, neutralizer cream, regenerating cream, and single-use doses, providing everything needed for a professional and effective brow lamination service.
Permanent Gel (15ml): Function and Composition
Thuya’s Permanent Gel (15ml) is the foundational element of the lamination process, meticulously formulated to reshape and redirect brow hairs, creating a fuller, more defined appearance. This gel works by breaking down the disulfide bonds within the hair structure, allowing for malleability and precise styling.
Its composition is a carefully balanced blend of chemical agents designed for efficacy and safety. While the exact ingredient list is proprietary, it’s understood to contain thioglycolic acid derivatives, crucial for the restructuring process. These components gently alter the hair’s internal structure, enabling the technician to smooth and lift the brows into the desired form.
The 15ml volume is designed for multiple applications, especially when utilizing the single-use doses for hygiene and precision. Proper application ensures even saturation of the brow hairs, maximizing the gel’s effectiveness and minimizing potential irritation. Understanding its function is key to achieving optimal lamination results.
Neutralizer Cream (15ml): Role in the Process
Thuya’s Neutralizer Cream (15ml) plays a critical role following the application of the Permanent Gel, effectively locking the newly shaped brow hairs into their desired position. This cream functions by reforming the disulfide bonds that were previously broken down, essentially “setting” the lamination. Without neutralization, the brows would revert to their original shape.
The formulation is designed to be gentle yet effective, ensuring the structural changes are stabilized without causing excessive damage or dryness. It’s crucial to apply the Neutralizer Cream evenly and thoroughly to all treated hairs for consistent results.
The 15ml volume provides sufficient product for multiple treatments, particularly when combined with the single-use doses. Precise timing during the neutralization phase is paramount; under-processing may lead to reversion, while over-processing could compromise hair health. Mastering this step is vital for long-lasting lamination.
Regenerating Cream (15ml): Aftercare & Hydration
Thuya’s Regenerating Cream (15ml) is an essential component of the post-lamination routine, designed to nourish and hydrate the brow hairs. The lamination process, while effective, can temporarily compromise the hair’s natural moisture balance, making aftercare crucial for maintaining healthy, vibrant brows.
This cream is formulated with ingredients intended to replenish lost hydration and support the overall health of the brow hairs, promoting flexibility and preventing breakage. Consistent application helps to extend the longevity of the lamination results and keeps the brows looking their best.
Clients should be instructed to apply the Regenerating Cream daily, or as recommended by the professional, to maximize its benefits. It’s a key element in ensuring client satisfaction and encouraging repeat business, demonstrating a commitment to long-term brow health.
Single-Use Doses: Neutralizer & Permanent Gel
The Thuya Brow Lamination Kit includes twelve single-use doses of both the Permanent Gel and Neutralizer Cream. This innovative packaging ensures optimal hygiene and product freshness for each client, minimizing the risk of contamination and maximizing efficacy. Pre-portioned doses also contribute to precise application and consistent results.
Utilizing single-use packets eliminates the need for double-dipping or transferring product, a critical factor in maintaining sanitary practices within a professional setting. This feature is particularly appealing to clients concerned about hygiene and demonstrates a commitment to safety.
These convenient doses streamline the lamination process, saving time and reducing product waste. They are a key element in delivering a professional, hygienic, and efficient brow lamination service with Thuya products.
Step-by-Step Thuya Brow Lamination Procedure
Achieving flawless brows with Thuya involves careful preparation, precise application of permanent gel and neutralizer, and diligent aftercare for long-lasting, beautiful results.

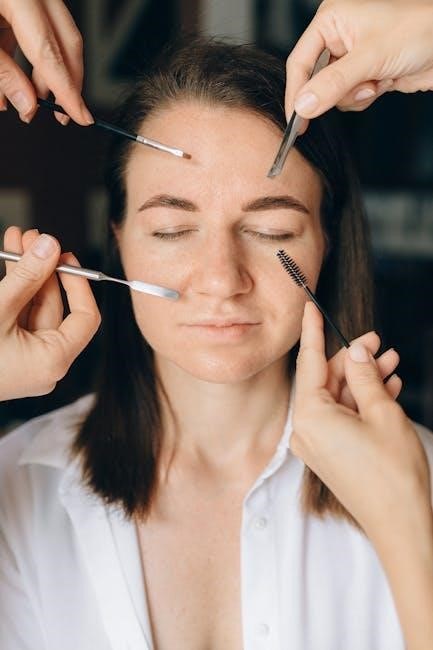
Preparation: Cleansing and Brow Mapping
Before commencing the Thuya brow lamination process, meticulous preparation is paramount for optimal results and client safety. Begin with a thorough cleansing of the eyebrow area, removing all traces of makeup, oils, and skincare products. This ensures the permanent gel can effectively penetrate the brow hairs.
Next, precise brow mapping is crucial. Analyze the client’s natural brow shape and desired outcome. Use a specialized brow mapping pencil to outline the ideal brow form, considering facial features and symmetry. This step guides the lamination process, ensuring a flattering and balanced result.
Carefully brush the brows upwards with a spoolie, following the mapped outline. This helps to lift the hairs and visualize the final laminated shape. Ensure the client understands the proposed shape and approves before proceeding. A well-executed preparation phase sets the foundation for a successful and satisfying Thuya brow lamination experience.
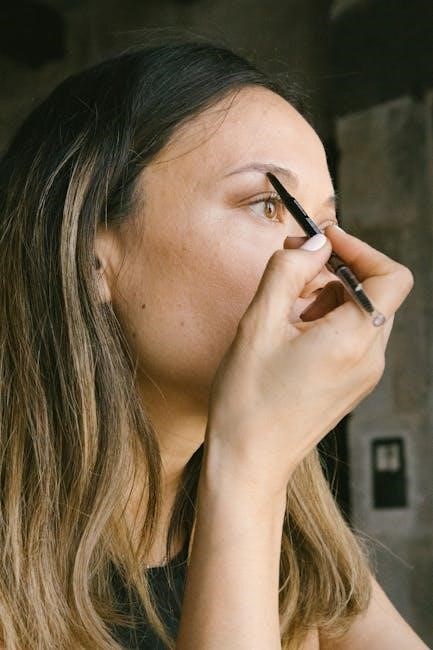
Step 1: Applying the Permanent Gel
With brows cleansed and mapped, carefully apply the Thuya Permanent Gel using a microbrush. Begin at the base of the brows, saturating each hair thoroughly, ensuring complete coverage from root to tip. Avoid getting the gel on the skin, as this can cause irritation. Work in small sections, combing the hairs upwards and into the desired shape, following the previously mapped outline.
Ensure all brow hairs are coated with the gel, paying close attention to any stray or unruly hairs. The goal is to reshape and redirect the hairs, creating a fuller, more defined brow. Use gentle pressure and precise movements to achieve a uniform application.
Avoid excessive product use; a thin, even layer is sufficient. Once applied, double-check the brow shape to confirm it aligns with the client’s expectations before proceeding to the processing stage.
Step 2: Processing Time for Permanent Gel
Following the application of the Thuya Permanent Gel, the processing time is crucial for achieving optimal results. Generally, the recommended processing time ranges from 7 to 10 minutes, but this can vary depending on the hair’s thickness and resistance. Fine or lighter hairs may require less time, while coarser or more resistant hairs may need the full 10 minutes.
During this period, closely monitor the brows. Regularly check the hair’s flexibility; it should feel pliable but not overly saturated. Avoid exceeding the maximum processing time of 10 minutes, as this could lead to damage or breakage.
Consistent monitoring is key to a successful lamination. A timing guide is essential for professionals to ensure consistent and predictable outcomes for each client, maximizing the effectiveness of the treatment.
Step 3: Removing the Permanent Gel
After the appropriate processing time, the Thuya Permanent Gel must be thoroughly removed from the brows. Utilize a clean, dry microbrush or spoolie to gently lift and wipe away the gel, working in the direction of hair growth. Ensure all traces of the product are eliminated to prevent any unwanted reactions during the next step.
Pay close attention to the skin surrounding the brows, carefully removing any gel residue to avoid irritation. A damp cotton pad can be used for a final cleanse, but avoid excessive saturation, as this could affect the neutralizer’s effectiveness.
Complete removal is vital for a safe and effective lamination. Proper technique ensures the neutralizer can properly set the new brow shape, delivering long-lasting, beautiful results for your clients.
Step 4: Applying the Neutralizer Cream
Following complete removal of the Permanent Gel, it’s time to apply the Thuya Neutralizer Cream. Using a clean microbrush or applicator, carefully coat each brow hair, ensuring full saturation from root to tip. This step is crucial for locking in the newly reshaped brow form and stabilizing the hair structure.
Apply a generous, even layer of the Neutralizer, avoiding contact with the skin as much as possible. Focus on meticulously shaping and setting each hair into the desired direction. The neutralizer effectively rebuilds the disulfide bonds broken down by the permanent gel.
Precise application guarantees optimal results and minimizes the risk of uneven lamination. A well-applied neutralizer is the key to achieving long-lasting, beautifully sculpted brows.
Step 5: Processing Time for Neutralizer Cream
After applying the Thuya Neutralizer Cream, the processing time is a critical factor in achieving successful brow lamination. Generally, the neutralizer should be left on for 8-12 minutes, but this can vary depending on the hair’s thickness and sensitivity.
Closely monitor the brows throughout the processing time. Regularly check for any signs of irritation or adverse reactions. It’s essential to adhere to the recommended timeframe to avoid over-processing, which can lead to damage or breakage.
Consistent timing ensures the neutralizer effectively rebuilds the hair’s structure, locking in the desired shape. Accurate processing is paramount for achieving optimal, long-lasting results with the Thuya Brow Lamination Kit.
Step 6: Removing the Neutralizer Cream
Following the designated processing time, carefully remove the Thuya Neutralizer Cream. Utilize a clean, dry microbrush or disposable applicator to gently wipe away the product, ensuring no residue remains on the brow hairs or surrounding skin.
Avoid harsh rubbing or excessive pressure during removal, as this could disrupt the newly laminated shape. A thorough removal is crucial for preventing irritation and ensuring the best possible outcome.
Once the neutralizer is completely removed, gently comb through the brows with a spoolie brush to assess the final result. This allows you to confirm the desired lift and shape have been achieved, completing a vital step in the Thuya lamination process.
Post-Lamination Care & Maintenance
Maintaining results requires diligent aftercare, including nourishing brows with Thuya Regenerating Cream and following recommended product guidelines for 4-6 weeks.
The Importance of Aftercare
Aftercare is paramount to maximizing and prolonging the stunning results achieved through Thuya Brow Lamination. The lamination process, while effective in reshaping and setting brow hairs, temporarily alters their structure. Without proper care, the effects can diminish prematurely, and the health of the brows could be compromised.
Hydration is key. The brow hairs need to be replenished with moisture and nutrients lost during the chemical process. Avoiding harsh chemicals, excessive rubbing, and prolonged water exposure in the initial 24-48 hours is crucial. This allows the newly shaped hairs to fully set and retain their desired form.
Consistent use of a dedicated aftercare product, like the Thuya Regenerating Cream, is highly recommended. This cream is specifically formulated to nourish, hydrate, and strengthen brow hairs, ensuring they remain healthy and resilient. Following these guidelines will not only extend the life of your lamination but also contribute to the long-term health and vitality of your brows.
Using Thuya Regenerating Cream
Thuya Regenerating Cream is a vital component of the post-lamination routine, designed to restore and maintain the health of brow hairs. Apply a small amount of the cream to clean, dry brows daily, ideally in the evening before bed. Gently massage the cream into the hairs, ensuring full coverage from root to tip.
The cream’s nourishing formula works to replenish moisture lost during the lamination process, preventing dryness and brittleness. It contains ingredients specifically chosen to strengthen the hair shaft and promote healthy growth; Consistent application helps to keep brows supple, conditioned, and looking their best.
Avoid applying excessive amounts of cream, as this can lead to a sticky residue. A pea-sized amount is generally sufficient for both brows. Incorporating Thuya Regenerating Cream into your daily routine will significantly contribute to the longevity and overall quality of your brow lamination results.
Recommended Aftercare Products
To maximize the duration and quality of your Thuya brow lamination, a dedicated aftercare regimen is crucial. Beyond the essential Thuya Regenerating Cream, consider incorporating a gentle brow cleanser to remove makeup and debris without disrupting the laminated shape. Avoid oil-based products immediately after lamination, as they can interfere with the setting process.
A spoolie brush is indispensable for daily grooming, helping to maintain the desired brow direction and shape. Regular, gentle brushing stimulates circulation and encourages healthy hair growth. Avoid excessive rubbing or harsh scrubbing, which can damage the delicate brow hairs.
Protecting your brows from prolonged water exposure, especially in the first 24-48 hours, is also recommended. Finally, consistent use of the Thuya Regenerating Cream will keep brows nourished and hydrated, extending the beautiful results of your lamination treatment.
Duration of Results: 4-6 Weeks
Typically, the stunning results achieved with Thuya Brow Lamination last between four to six weeks. However, this timeframe isn’t fixed and is influenced by several individual factors. Your client’s natural brow hair growth cycle plays a significant role; faster growth means quicker reversion to the original shape.
Adherence to the recommended aftercare routine is equally important. Consistent use of the Thuya Regenerating Cream and avoiding harsh treatments will prolong the laminated effect. Lifestyle factors, such as frequent swimming or excessive sweating, can also impact longevity.
To maintain optimal results, encourage clients to schedule follow-up appointments every 6-8 weeks. This allows for touch-ups and ensures consistently flawless brows. Remember, proper care extends the life of the lamination and keeps brows healthy.
Troubleshooting & FAQs
Addressing common issues requires client consultations, patch testing, and professional training; understanding brow hair growth cycles is also crucial for optimal lamination outcomes.
Addressing Common Issues
Uneven lift: Ensure thorough saturation of brow hairs with the permanent gel, paying close attention to coarser or slower-processing areas. Adjust processing times accordingly, monitoring closely.
Over-processing/Damage: Strictly adhere to recommended processing times. If over-processing occurs, immediately neutralize and apply the regenerating cream to help restore hydration and strengthen the brow hairs. Emphasize the importance of patch testing beforehand.
Insufficient lift: Verify the correct amount of permanent gel is used and that it’s applied in the correct direction. Consider slightly extending the processing time within safe limits for subsequent treatments, but always prioritize brow health.
Irritation/Sensitivity: Discontinue use immediately if any signs of irritation appear. A thorough patch test 48 hours prior is vital. Advise clients to avoid water and makeup for 24 hours post-treatment to minimize risk.
Uneven color uptake (with tinting): Ensure brows are completely dry before applying tint. Use a high-quality, compatible tint and follow manufacturer’s instructions precisely.
Client Consultation & Patch Testing
Thorough consultation is paramount. Discuss client expectations, brow history (previous lamination, tinting, waxing), skin sensitivities, and any medical conditions or medications that might contraindicate treatment. Assess brow hair type, density, and growth patterns.
Mandatory patch testing must be performed at least 48 hours prior to the full lamination service. Apply a small amount of the permanent gel to a discreet area (e.g., behind the ear or inner arm) and monitor for any adverse reactions – redness, itching, swelling, or burning.
Document all consultation details and patch test results in the client’s record; Explain the entire process, potential risks, and aftercare requirements. Obtain informed consent before proceeding.
Contraindications include skin irritation, open wounds, eczema, psoriasis in the brow area, pregnancy, breastfeeding, and recent facial surgeries or chemical peels. Always prioritize client safety.
Professional Training & Resources
Mastering Thuya brow lamination requires dedicated training to ensure safe and effective application. Comprehensive courses are available, covering product knowledge, treatment protocols, ingredient explanations, and precise timing guides.
Look for masterclasses that equip beauty professionals with the skills to soften, set, and condition brow hairs for long-lasting results. These programs often include Q&A checkpoints and access to experienced trainers for personalized guidance.

Thuya provides a “powerhouse of knowledge” packed with real science and detailed breakdowns of their products. Utilize these resources to deepen your understanding of the lamination process and address client concerns confidently.
Stay updated with the latest techniques and best practices through industry events, online forums, and Thuya’s official website. Continuous learning is crucial for delivering outstanding, professional-grade brow lamination services.
Understanding Brow Hair Growth Cycles
Brow lamination results are intrinsically linked to individual hair growth cycles. Clients experience varying durations – typically 4 to 6 weeks – based on these natural cycles and diligent aftercare adherence.
The anagen phase, or growth phase, dictates how long brow hairs actively grow before entering a resting phase. Longer anagen phases generally correlate with longer-lasting lamination effects.
Educate clients about the importance of maintaining brow health to support optimal hair growth. Factors like stress, diet, and hormonal changes can influence the growth cycle.
Realistic expectations are key; lamination doesn’t alter the growth cycle itself, but rather temporarily restructures existing hairs. Consistent aftercare, utilizing Thuya’s regenerating cream, helps nourish brows between treatments and maximize results within the natural growth timeframe.